Monday, February 11, 2019

Combine Metro Cop (Half-Life 2) Part 2: Weapons and Accessories

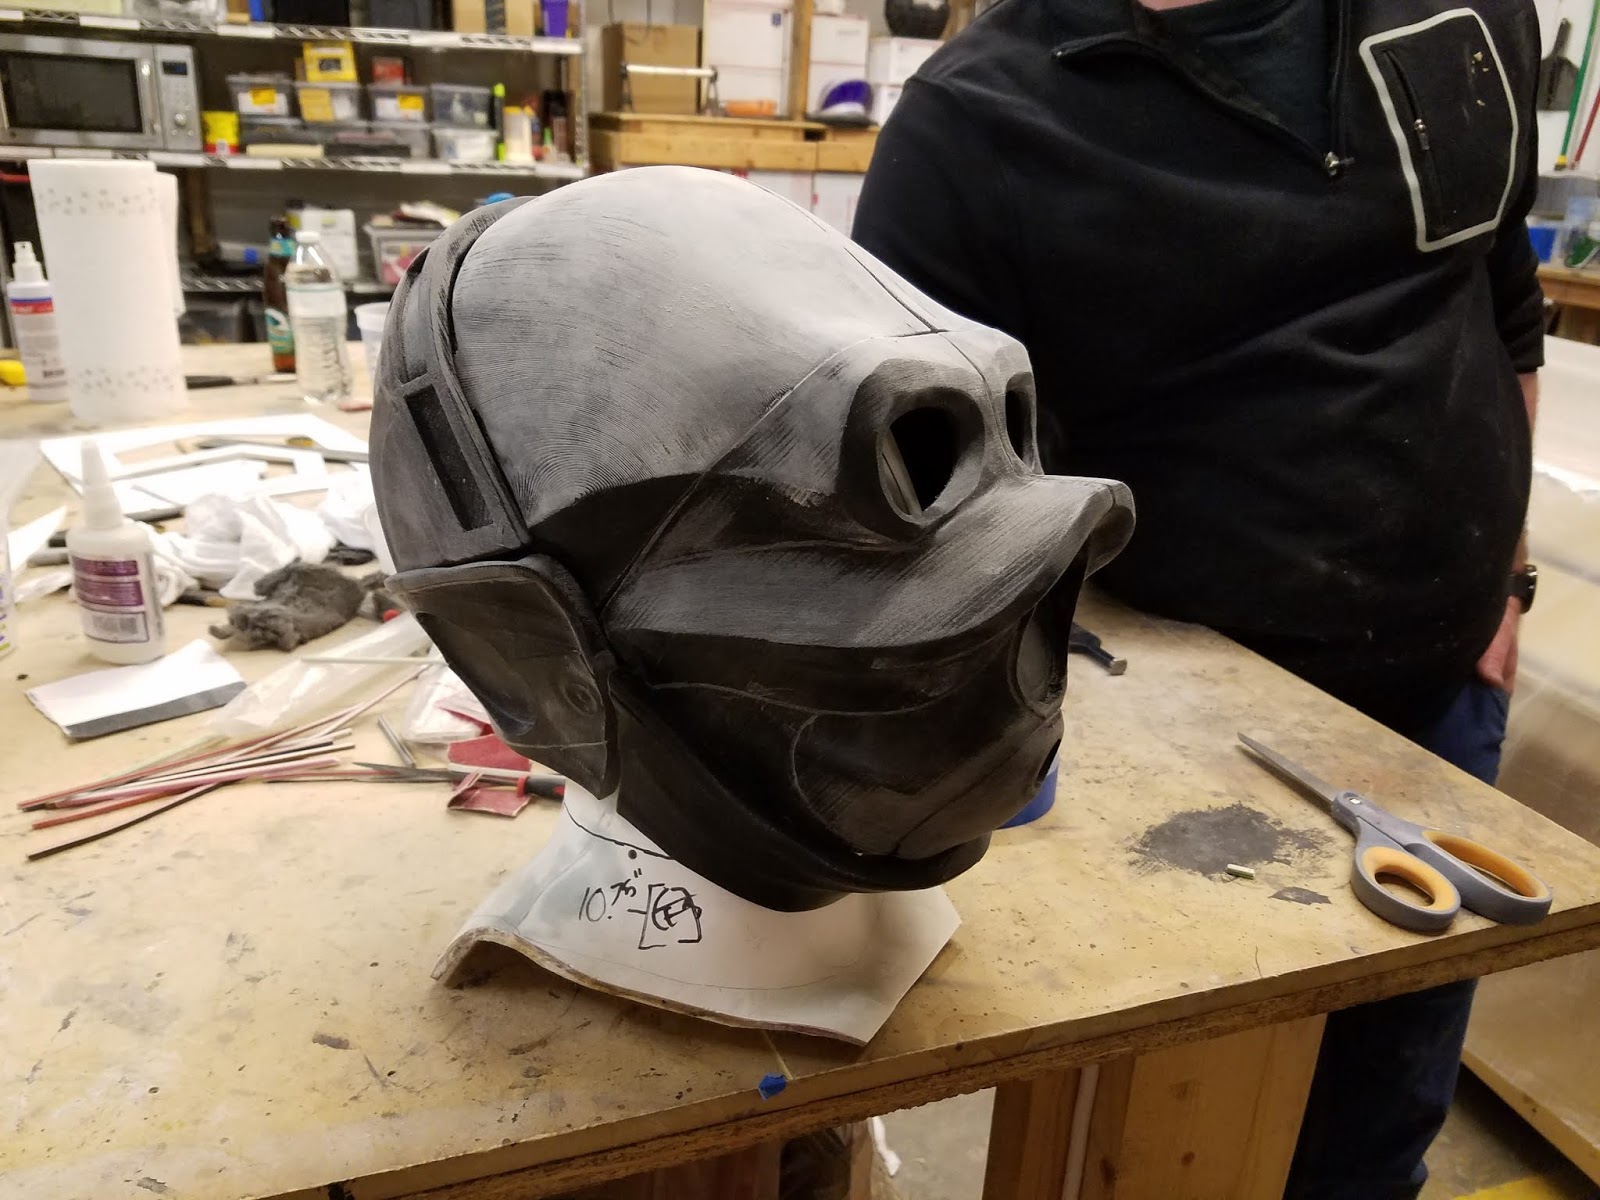
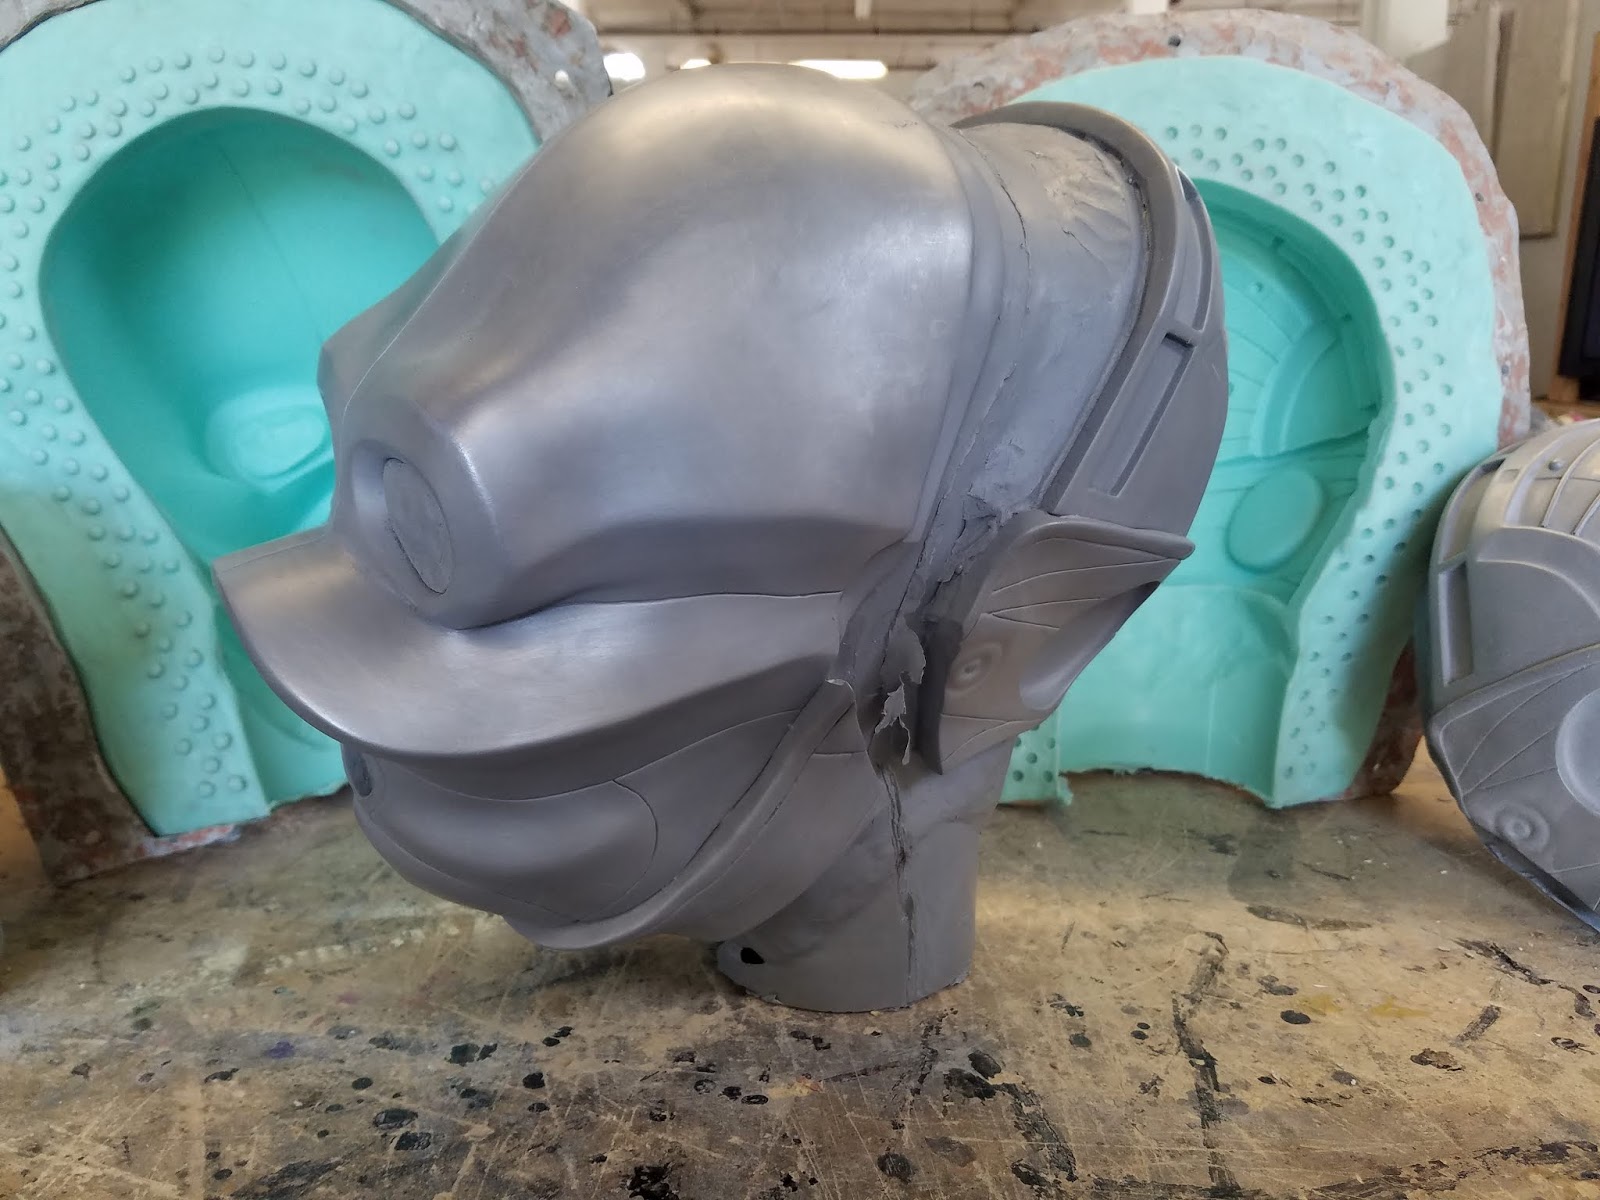
The Combine in Half-Life 2, and the Civil Protection especially, have some very distinct and iconic elements to them. During the build, I kept telling my team that the costume was basically three things - the helmet, the Stun Stick, and the voice, and that everything else was just window dressing. The helmets were already a slam dunk, so it was on to the rest of the parts.


One major component of the build was the voice modulated radios. The Combine have such an iconic sound to them that it was critical that it somehow be included. I didn't want to use a low quality voice modulator, because A.) they never sound "right" and because the sound is so distinct I know I'd never be able to actually get them sounding right. And B.) the Combine's voice modulators make them almost unintelligible, and I didn't want people confusing me asking them to move away or stand back as part of a performance.

Instead, I opted for the next best thing I could: I used the real game audio.


During the early "pre criminal" part of the game, the Civil Protection are docile and you can observe them walking around. They play random radio chatter throughout the game, but you get the clearest vision of it during this opening section of the game. They have these radios on their belt, and I decided to use them to house an Arduino and some audio components from Adafruit. The electronics build part of this is pretty straight forward - an Arduino Uno using an Adafruit Wave shield and a 3.7W amp, fitted on to a prototyping board for easy packaging.


Three of them isn't necessary for the build, but I wanted three of us to have radios for some fun sounding cross chatter, so I bought three of everything.

I used Fusion 360 to build a case for the electronics and made it look as close to the game radio as possible, although it did wind up being a bit larger than I would have liked. The real workhorse is the code that I wrote; in the game, the Combine radios use randomly generated "sentences" based off of rules in a sentences file and words and sentence fragment sound files. My code emulates that radio logic, building a sentences and playing the sound files extracted from the game.

The result is as authentic of a Combine radio as you can get.


Then it was time to build the weapons. The Stun Stick was a deceptively simple part of the build. Early in the game the Metro Cops you meet use these electrified billy clubs to keep the local population in line, and assist in local aluminum can cleanup.

As with most parts of this build, I started by extracting the game model to use as a reference - only this time, there was a bit of a snag. The player never actually gets a hold of the Stun Stick, so all that exists is a very low resolution "world model".


After digging deeper, I actually found 2 useable "view models" of the Stun Stick - one from Half-Life 2: Deathmatch, wherein some players play as the Combine and use the Stun Stick in lieu of the crowbar. And another in the game files of a cut weapon. The next problem is that these 2 view models were very different from one another. With the only definitive version being the low resolution world model, I decided to create an idealized version of the Stun Stick using elements from all 3 versions.


This was designed in Fusion 360 and printed on my fleet of 3D printers. It was designed to fit around a 3/4" PVC pipe, so that the only parts that needed to be molded and cast were the head with the flanges, the cross guard, and the pommel. This helped keep the weight and the cost of making them down, since I didn't need a large mold or a lot of resin. The Stun Stick heads were molded in a 2 part block mold, and the pommels and cross guards were molded in an open block mold together.


Once all of the Stun Stick parts were cast up, they were primed and painted in a base coat of dark metallic paint, and then the flanges were masked off and painted bright "safety orange". The bright color really made them pop.


The Metro Cops also carry pistols on them, which are nothing more than an H&K USP Match with a giant compensator on the end of it. Rather than spend a ton of time 3D modeling, printing, and sanding and finishing one of these, instead I opted to find a low cost 1:1 scale airsoft replica and use that as a base. The only thing I needed to fabricate was the compensator, and after a day's work the pistol was ready to mold.


The pistols were also molded in a 2 part mold. The pistols are a matte black with a bright metallic slide, so like the helmets I decided to cold cast the pistols. I wound up cold casting the entire weapon, which made weathering it as easy as gently scraping, scratching, and sanding away the paint to reveal the metallic under layer. Painting and weathering was as easy as masking off the slide, painting the rest of the gun matte black, then scuffing and scraping away the paint where I wanted obvious signs of wear.


A last minute detail I added was the big metallic belt buckles. These were thrown together in Fusion 360, then printed, cleaned, molded, and cold cast just like the pistols. Unfortunately this was such a last minute detail that I failed to get any pictures of the entire process.


All that's left after this is the flak jackets and putting the costumes all together.


More from this build:
Part 1: Helmets
Part 2: Weapons and Accessories
Part 3: Fabric Parts and Final Reveal


Watch the build documentary on YouTube
Read More

Monday, February 4, 2019

Combine Metro Cop (Half-Life 2) Part 1: Helmets

The Half-Life series has always been one of my favorite game series, and Half-Life 2 in particular has a special place in my heart. After all, it's the reason the first prop I ever built was the Gravity Gun. From the beginning I knew I wanted to some day do a group of Combine from Half-Life 2, and I knew I wanted to do them the right way.


Nine months later, I feel like I succeeded. Well, on the first group of Combine at least.

Let's go back to the beginning. Early in 2018, I contact a friend of mine Alex Winslow to see about getting some high quality 3D models made of the various Combine helmets - the Civil Protection (AKA the Metro Cops), the Combine Soldier, and the Combine Elite. After taking a ton of references from the game, pulling the game model and materials, and throwing in some of my own personal design ideas, Alex delivered these models to me.


They were perfect.

I immediately set out 3D printing the Civil Protection helmet, using a combination on FDM and SLA printing. For those of you who aren't familiar with those terms, FDM is the typical plastic printing that you see most people have in their homes or workshops. SLA printers are less common, although they are certainly gaining popularity. They use a UV curing liquid resin to print parts and the print quality is exponentially higher.


I used SLA printing on some of the incredibly fine details for the Metro Cop helmet, specifically the "ears" as well as the gas mask parts. The rest of the helmet was printed in ABS on my fleet of FDM printers. A couple days later, and I had the base helmet finished.


From here it was a typical round of body shop work on the helmet - sand the base print, apply filler primer to fill any remaining print lines, sand the primer down smooth, add spot putty to any left over imperfections. I knew I wanted to cold cast these helmets to give them a realistic metallic luster, so I also went ahead and applied a wet sandable automotive primer and wet sanded the helmet to a glossy finish.


Having gotten familiar with the limitations of FDM printing, I had planned from the beginning to use model making techniques to add in additional details, and use the 3D print as a base form. On the back of the helmet are these rib and dome detail sections. Rather than 3D model and print them, I used thin pieces of styrene tube and some half dome scrapbooking accents to add the details I needed. The result was exactly what I had hoped.


After several rounds of priming, sanding, and filling, the helmet was ready to mold. Having just one Metro Cop would be fun, but having a whole squadron of us would be even better. Molding and casting the helmet presented some challenges, since again I knew I wanted to cold cast the final helmets, which would limit where I could have seam lines. The helmet also has a very pronounced "duck bill", so the mold would be very deep and difficult to pull out from.


In the end, I opted to create a 2 part brushed on mold, with a 3 part mother mold. The 2 part mold would hide the seam between the 2 halves of the cast, and the 3 part mother mold would allow me to more easily remove the "duck bill" from the mother and the cast from the mold.


Several days later, the mold was finished and the first test cast came out flawlessly, I started production on the run of the helmets. The helmets were made by first brushing in a coat of aluminum powder to give the cold cast metallic effect, and then by mixing and pouring several small batches of roto casting resin (Smooth Cast 65D from Smooth-On). A final coat of more rigid resin (Smooth Cast Onyx from Smooth-On) was applied last, to help the helmets avoid warping over time as 65D has a tendency to do.


The detail parts that were printed on the SLA printers needed nearly no cleanup, and so went straight to silicone. These were created using simple 2 part block molds, and would be cast solid. The ears were cast in a semi-translucent resin (Smooth Cast 326 from Smooth-On) with a small amount of green tint added. The ears in the game give off a faint glow, so I wanted these to be translucent so that I could back light them once installed in the final helmets. The gas mask details were also cold cast with aluminum powder and a regular casting resin (Smooth Cast 300 from Smooth-On).


With all of the casting was complete, the set of them were cleaned of their flashing and excess resin (such as where the lenses needed to go) using a rotary tool. The "neck seal" of the helmets were masked off using masking tape and plastic wrap, then painted in a flat black. The lenses were created using some smoked acrylic that I had on hand in the shop, cut in to shape and glued in to place using cyanoacrylate glue. The gas mask and ear details were fitted and glued in to place using epoxy. The helmet fronts and backs were attached together using velcro along the ridge line, where the front seats underneath the back.


Lastly, the helmets were given a wash in watered down black and brown acrylic paint, which was then quickly wiped away, leaving grime and dirt in the recessed areas. Then the helmets were polished using #000 steel wool, which brought the metallic luster of the helmets to life. It's actually incredible how different lighting conditions can make the helmets look completely different from one photo to another.


I was very happy with how they turned out, and I really felt like I had brought the Civil Protection to life with this build.

After the helmets, it was on to all of the weapons and accessories.


More from this build:
Part 1: Helmets
Part 2: Weapons and Accessories
Part 3: Fabric Parts and Final Reveal


Watch the build documentary on YouTube
Read More

Tuesday, March 1, 2016

Building a RepRap Wilson

I really love 3D printing. I enjoy the end results as much as I am interested in the technology behind the machines themselves. Having a background in 3D design, it was obvious to me that 3D printing was something I was going to get interested and involved in. But had you told me 5 years ago that I would be building them from scratch, I'd have a hard time believing you. Unfortunately for past me, I've done just that - since November, I have built three printers from nothing.


My journey of self built printers began last year when I started researching various Prusa i3 designs. I had a few things I needed from a printer - it had to be reliable, it had to be sturdy, and it had to have high print fidelity. For these reasons, I wanted a printer frame built from aluminum extrusion (and it didn't hurt that I had a bunch on hand already). I also wanted it to be as close to a full RepRap as possible - no acrylic or machined parts. Some people might consider this a negative, but don't forget I am an enthusiast in the tech as much as I am the finished results.


After doing some research, I settled on an Adapto printer - it had a large build volume, it was built entirely from 2020 aluminum extrusion, and all of the parts were printed. I put together the aluminum bits and started printing things, and I ran into a few snags. The first of which is that the threaded rod I had on hand was larger than what the design called for. While that isn't a big problem - it's simple enough to modify the designs - the new printed parts began having problems where the captured nut would physically intersect where the linear bearings would be. Or in simpler terms - I would have to start majorly redesigning the printer, or buy all new parts, if I wanted to use it.


I was a little frustrated with the process, and around this time, the Colonial Marines group build at Freeside began to consume all of my free time. I had set the Adapto on the shelf to pick back up, where it was untouched for most of last year. Once the group project and the various events for the year was over, I started researching some other RepRap designs. I was planning on rebuilding one of Freeside Atlanta's printers into a new usable design, and came across the Wilson TS. I did an inventory of all of the parts I had on hand, and it turns out I had everything I needed to convert my Adapto to a Wilson.


I was building The Kraken and my Wilson in tandem and the build was a breeze. The instructions online from mjrice are pretty good - his videos are for the 10mm smooth rod version instead of the 8mm ones I was building, so parts differ a bit - but having put together both my Folger Tech 2020 i3 and doing a lot of work on my LulzBot AO-101 and Freeside's AO-100, I knew my way around how to put a printer together.


I did decide to make a few modifications right away. The first of which is to help the structural support of the machine by adding in some hidden corner braces in all of the 2020 corners, and L brackets where the X-axis and Y-axis frames meet. This helps make the printer be extremely rigid and the prints that come off of it look amazing. I also added in an inductive sensor for the Z probe to enable auto bed tramming, a feature on the LulzBot Mini that I am totally in love with. Having your first layer always be perfect without much interaction is a real dream come true, even if the initial setup is a bit of a hassle.


I purchased an LCD screen with SD card support so that I can run the printer without having my laptop connected. This is an important feature for me since I am often running all of my machines simultaneously, and I don't want to have my laptop permanently attached to them. On my Wilson I am using a RAMBo board, and setting up the LCD had some pitfalls. The Arduino board library has to be modified in order for the RAMBo to properly output to the LCD. Here's the article I found on doing just that.

I added a top-mount for my filament spool, but I may actually take this off as it seems to have created a really unbalanced load. Running the printer at the speeds I had while the spool was on the table causes it to vibrate and move around a lot. I'm going to slow down the printing a bit and try to tune the feedrate, jerk, and acceleration settings. But having a really slow printing machine isn't a lot of benefit to me so hopefully I don't have to slow it down too much.


I've only been printing on the Wilson for a couple of weeks and I'm really happy with both my Wilson and Freeside's "The Kraken". For my next printer I am going to look into the Wilson 2 which improves on the current design, and given how great of a machine this already is, I think the Wilson 2 could be an outstanding machine.


Here are some links to the parts and designs used for my Wilson builds:
Read More

Friday, February 19, 2016

February Project Updates

I'm at an awkward stage for all of my projects, where I'm not quite done with some of them, and not quite started enough on others to start doing write-ups. It's weird to spend an average day working on several things, and not really feel like you made much progress or have anything to show for the work, yet actually have things accomplished.

My ongoing work on various 3D printers continues. I finished building my Wilson TS RepRap printer and brought it home to my printing fleet. I also have more or less finished Freeside Atlanta's Wilson known as "The Kraken" and it should be printing soon as well. I'll be writing up a build log and review of the Wilson once I have both of them in fully working order.


I've also been tinkering with Freeside's LulzBot AO-100 (and by extension, my personal LulzBot AO-101) to work out some problems it's having. That machine is really old and has had a lot of wear on it over the years, so I've had to really show it some love.


In actual prop news, I have a handful of space guns in the works.

A few months ago I decided to start making the Quake 2 Blaster that I've had an idea to make in the back of my mind forever. I have it cast up and ready to start painting, so this should be done very soon and I'll be posting a build log.


Speaking of side projects, I've been teaching Elliott about prop and costume building, and we picked a project to learn things on. We're building a set of Marine armor from the game Natural Selection 2, and we've been 3D printing the rifle and the pistol.


As if I didn't have enough space gun projects, I printed out the Federation laser rifle from Rick & Morty. Right now it's had a first pass of primer, so there's a lot of work left on this one.


The main event this year though is the T-60 Power Armor from Fallout 4. A couple weeks ago, Mike Vrogy came up to the space and helped Elliott and I build the stilts. We're starting 3D printing and CNC production on the rest of the armor, but that's going to be a much bigger write up!


That's all for now, keep an eye for more write ups soon.
Read More

Friday, January 22, 2016

Review: Folger Tech 2020 i3 kit

I had been in the market for another 3D printer for my fabrication fleet, and I had my eye on a few machines during Black Friday. I narrowly missed a great sale on a Wanhao Duplicator i3 for a cool $299, and instead I settled on a Folger Tech 2020 i3 kit on sale with an LCD panel.


I had done some reading on this particular kit so I knew to expect some hurdles during it's construction. The biggest complaint that the community has - and indeed I have too - is that the build manual has several mistakes and blatant inaccuracies that Folger Tech has yet to fix. There's some simple stuff like typos of bolt dimensions - using one bolt length in one sentence and another length in the next sentence, leaving you to figure out which one they really mean. These are easy to figure out. But then there's the problem where it tells you to mount the X-axis end stop on the wrong side, and if you don't understand why 3D printers are put together the way they are, you'll have a difficult time understanding why it's moving in the "wrong" direction and why it won't home properly. I highly recommend reading the manual fully before starting to make sure you know what to expect.

There is an absolutely massive thread on the RepRap forums which contain a huge amount of information and fixes. As of this writing, the thread is at 88 pages long and I've only managed to work backwards through about half of it. If you're considering one of these kits I recommend at least skimming through the forum thread on your own, but I've tried to compile the biggest issues and fixes from my experience here.


One minor annoyance I had was with the T-nuts that were included. They are very tiny and difficult to work with and I kept struggling with getting them into place whenever I had to tighten down or move an element. I think they are the ones that are meant to be used after you've put a 2020 frame together, so that you don't have to disassemble everything. But that they are so small it makes them a pain to slide into place along a stretch of aluminum. Your kit may come with regular sized T-nuts, but if I were to buy another one of these kits, I would go ahead and get a bag of regular sized T-nuts just to save myself some frustration.


The electronics setup was straight forward if you've used a RAMPS board before. The build manual tells you where to connect things, but I do recommend pulling up the RAMPS schematic so you know what you're connecting to and why. This is especially the case with the X-axis end stop, since as mentioned before the build manual has some incorrect info.

The RAMPS board I received appears to have had some damage in shipping. I did testing of it and it doesn't seem to be more than cosmetic, but I did read that others had issues with poor quality soldering as well as similar damage. The good news is that Folger Tech is good about sending replacements for parts, but I'm holding off on seeing if that's necessary since I've put about 50 hours on the machine without any hiccups so far.


One problem I do have in the electronics department is that there is not a power switch for the machine. This is a pretty minor complaint, but I do like being able to power off the power supply without having to pull the plug or turn off a power strip. I found a mod on Thingiverse to both add a switch and a removeable power cable which is on my list of to-do upgrades.

Folger Tech has a version of the Marlin firmware on their site to download, but it's quite a few versions behind the current release. The community again comes to the rescue, and therippa has a fork of the latest release of Marlin with the Folger Tech settings already imported. There's also a version that enables auto bed tramming if you decide to upgrade to an inductive Z sensor as well - which I went ahead and added to my build, and in general I can't recommend enough.

Speaking of the Z-axis, the stock Z end stop leaves a lot to be desired. It's difficult to get it really zeroed in since it's attached to the smooth rod. There's a lot of options on how to fix this, and I went with a solution similar to what I've seen on other machines. I printed a part that attaches to the X motor mount points and puts an M3 bolt in the path of the Z end stop. This way you can easily tighten or loosen the bolt to raise or lower the contact point by small increments. I also printed a thumbscrew head for the bolt to make it even easier. Of course, if you are using auto bed tramming, you won't need to worry about this.

The Z-axis is driven by a M5 threaded rod, which seems pretty rickety compared to other machines I use that have M8 or larger lead screws. There is a popular mod for this machine to use M8 lead screws and there are several parts on Thingiverse ready to convert it over if you're so inclined. It seems like a great modification and I may switch to that in the future, but I'm not excited about having to basically completely disassemble the machine just to install it. If you decide to stick with the stock M5 threaded rod, there's also an anti-backlash hack if you want to get the most out of your stock parts. Otherwise, if you want to upgrade to a bigger threaded rod, plan on doing that during your initial build and save yourself some time.


The last problem I had with the Z-axis is that it is simply shorter than is advertised. Folger Tech's site says it has a 7" build height, but the machine really is only able to get about 5" with the Z-axis printed parts. I did find a mod on Thingiverse for Z motor stand-offs that regain the extra 2", but I'm really just confused about why it's advertised with that size. My printing volume with this hack is 200mm x 200mm x 160mm.

I've seen others who have moved the Z-axis steppers to the bottom rather than the top, and again that's something I may do in the future since the top of my machine is already pretty cramped. Between the spool holder and the LCD mount, the steppers would be nice and out of the way on the bottom.


Aside from all of that, I really am quite happy with the printer. The prints coming off of it are an excellent quality and I really have no complaints in that department. I've printed all of the modifications to the machine on itself, so it's a "true" RepRap printer in that regard. One of the first mods I made was a different filament mount, a top mounted bearing spool holder to replace the side mounted one. If you don't use a bearing driven spool holder, I can't recommend them highly enough, it reduces any filament drag artifacts from your prints.


The overall construction is great, the all aluminum frame and the corner brackets make the whole chassis incredibly rigid. This really shows through in the print quality. One thing I especially like is that it uses almost zero laser cut parts, the only ones included are to hold the Z-axis smooth rods in place. Everything else is metal-on-metal contact, or standard 3D printed RepRap parts.

I did go ahead and buy some cable management to tidy up the mess of wires. Back in my PC case modding days I used the nylon flex tubing "Techflex" religiously, so I used that for as many of the runs as I could. I also bought some drag chain for the X and Y axes to minimize issues with cables tugging or crashing into the print. Plus it makes the printer look a lot more clean and professional, which is nice.


The deal I got included an LCD screen, which I primarily use for the SD card reader since I don't like having to keep a computer attached to my printers at all times. It doesn't come with a mount or a bezel, but thankfully you already have a 3D printer to make one. There's a lot of options available depending on where you want to place yours. I may find a different location for mine since it's a tight fit between the spool holder and the LCD panel on the top. As always, be sure you check your firmware to make the necessary changes to activate the LCD panel and SD card reader!

For the price, this kit really can't be beat and I'm already very happy with it. I would hesitate to say it's great for beginners, but if you're someone who has some hands-on experience with a 3D printer - using one at school or work - and you want to make the jump to buying your own, this would be a good machine to pick up.


Here's a few collections of parts that I recommend looking in to if you're considering buying this machine, or if you already have one and want to fix some of the common bugs with it.

Collection of upgrades on Thingiverse

Collection of upgrades on the RepRap.org forums
Read More